Hardware: The VR Case
Your Draxon VR case contains everything you need to run training sessions. Depending on your setup, you have either a single-headset case or a multi-headset case. Select the section that matches your case below.
Hardware Setup
Single-Headset Case
The single-headset case is a compact case containing a single VR headset and the essentials for running training sessions.
When you open the case, you will find:
- 1 Meta Quest 3 headset with head strap and two controllers
- 1 USB-C charging cable — plug into the port on the left side of the headset to charge
- Spare AA batteries for the controllers
- Microfibre cloth and antibacterial wipes for cleaning between trainees
Charging
This case does not include an external battery. Charge the headset via the USB-C cable after each session so it is ready for the next one. A full charge takes about 2 hours and lasts 2–3 hours of training.
Wi-Fi Router
A Wi-Fi router is not included in trial bookings. Connect the headset to your office Wi-Fi instead (see the Connecting to Wi-Fi section).
Single-Headset Case Overview
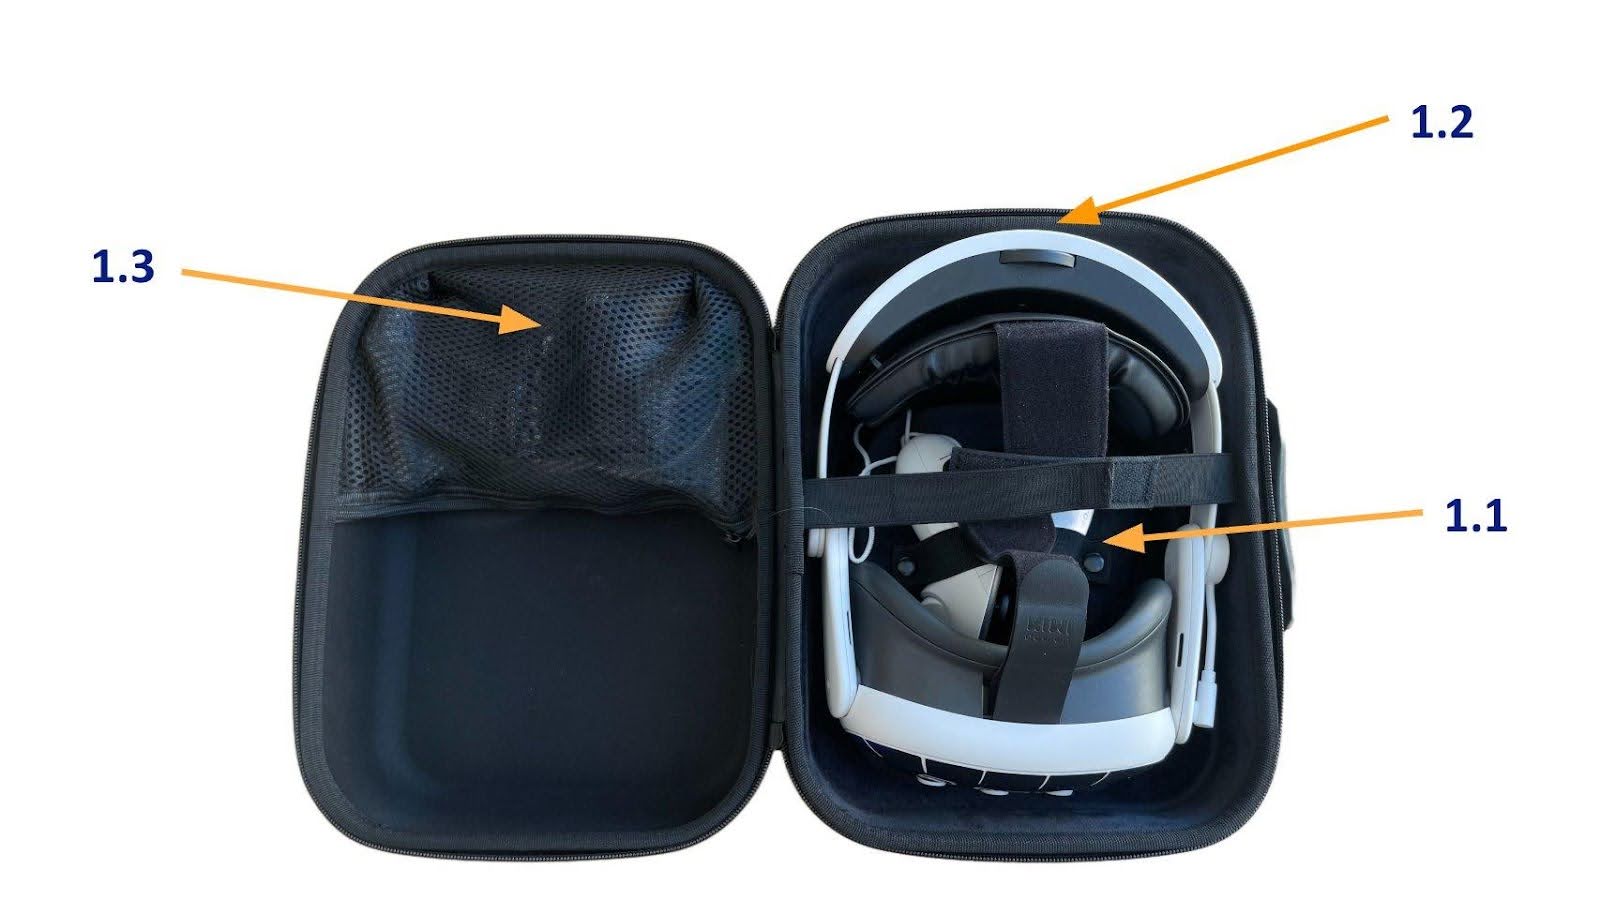
The single-headset case: 1.1 Headset, 1.2 Controllers, 1.3 Accessories
Tip: Wipe down the headset with an antibacterial wipe after each trainee and charge the headset overnight.
Multi-Headset Case (Full Setup)
The full setup case contains 4 or 5 headsets with a built-in charging system and accessories.
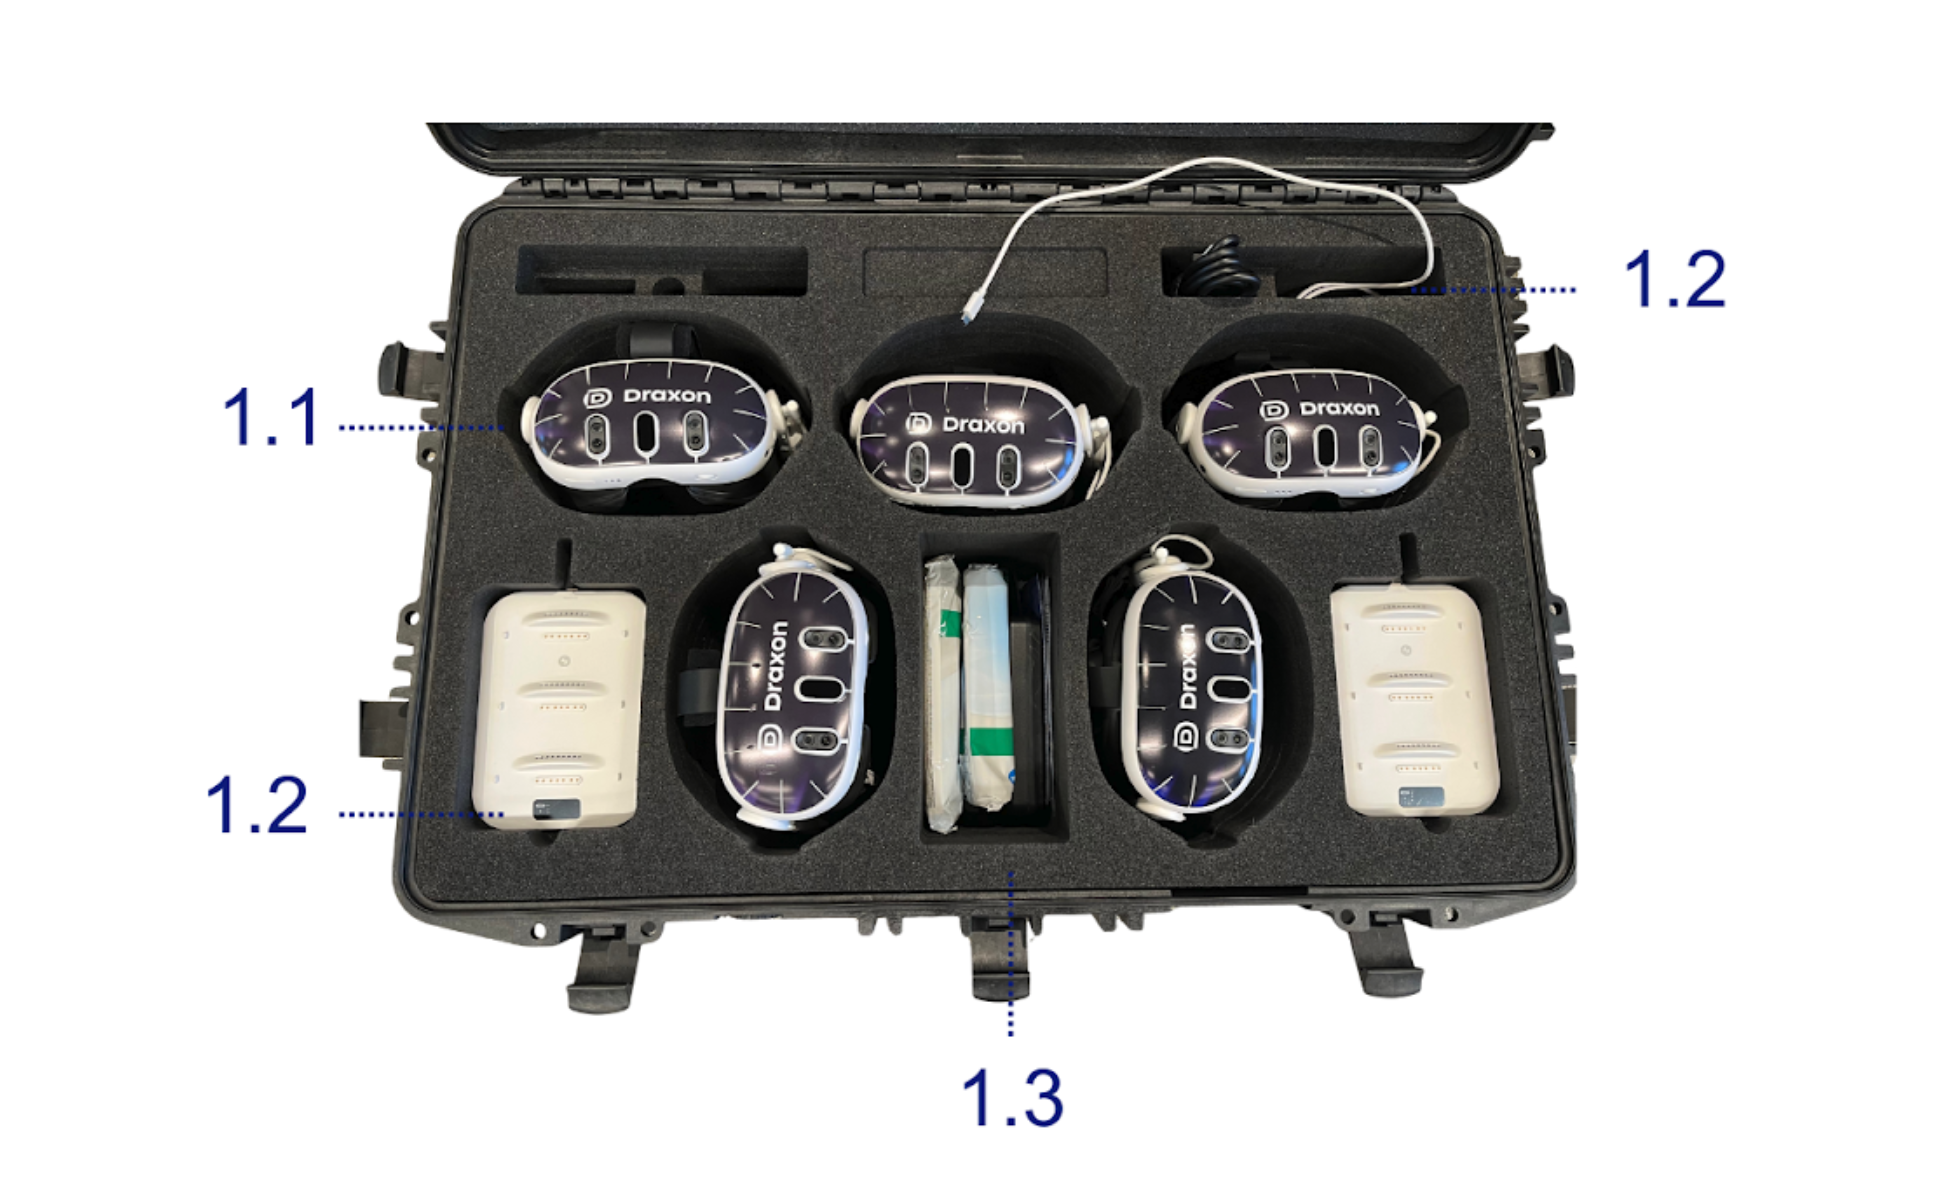
The Draxon VR case — full setup
1.1 Headset Compartments
- 4 or 5 headsets depending on the case size, each in its own compartment.
- Controllers: If your case has dedicated controller slots, place them there. If not, store the controllers inside the headset.
1.2 Charging Setup
- Single cable: One cable powers the entire case and charges all exchangeable headset batteries at once.
- Headset battery chargers: One or two chargers inside, depending on the case size.
- External batteries: Attach a battery to the back of the headset for an extra 2–3 hours of use. The headset must be turned on for the external battery to charge it.
- Built-in battery: You can also charge the headset directly via the USB-C port on the left side. A full charge lasts 2–3 hours.
1.3 Accessories Compartment
In the middle of the case, you will find:
- Antibacterial wipes
- Microfibre cloth
- Rechargeable AA batteries for the controllers and an AA battery charger
- Wi-Fi router (optional — see below)
Wi-Fi Router (Optional)
Not all bookings include a Wi-Fi router. If your case contains one:
- Power on: Press and hold the button on top of the router for a few seconds.
- Charging: Use the USB-C port on the bottom of the router.
- Network credentials: The network name and password are printed on the label on the back of the router.
If your booking does not include a router, connect the headsets to your office Wi-Fi instead (see the Connecting to Wi-Fi section).
Before You Close the Case
Important: Never close the case while the charging cable is plugged in or while batteries are actively charging. There is a risk of overheating when charging inside a closed case.
Before closing, make sure:
- All headsets and controllers are placed back in their compartments
- No cables are pinched or sticking out
- External batteries are detached from headsets and placed in the charger
Tip: Remove the batteries from the controllers after each training session and reinsert them before the next one. This prevents the batteries from discharging while stored.